Category Archives: 3D Printing Tools

3D Printing News – Doodle 3D Transform

In a world where we can buy affordable 3d printers it can seem intimidating when it comes to creating your own 3D model for the first time. This is what the founders envisioned when they created their first successful Kickstarter for the Doodle 3d WiFi box with embeded sketch app (still available). For the first time you could not only use your fingers to paint a 2d sketch and extrude it into 3D you could send the design directly to your printer over USB. The WiFi box hosts an app that allows any touch interface like phones or tablets to be the modeling tool wirelessly. It’s much easier than it sounds.

The founders have improved upon the concept by releasing the Doodle3D Transform App, which runs a web technology-based app and forthcoming tablet app, pending a successful campaign. You can draw by hand, scan photos/drawings or import existing images. In addition to sending your design to your 3D-printer you can upload it to an online service like 3D Hubs for output, if you’re still saving up for a printer. But instead of being limited to single-walled prints you can create complex objects with the same simplicity of the original. Watch the video above and see all the capabilities on their campaign page.

I can’t think of a quicker or more fun way to get started in modeling! You can find out more about the features on the Kickstarter Page and more about their company on their website.

3D Printing News – 3D Prints for Teachers of the Visually Impaired

Pasted Image 9 7 16 12 00 PM

The above image shows solids that all have the same volume, you can check this by filling one with water and then pouring that water into the next, fixed-volume objects. You can use the OpenSCAD script that Rich Cameron (aka Whosawhatsis) shared or download the sample objects. But why? Rich Cameron and Joan Horvarth, well-known authors, are on a mission to get all the 3d printers in the world, in all those new classrooms to help visually impaired students make use of 3D prints to learn just about any subject, but they need help making good models. This is where you come in.

Start off by downloading the sample objects above or generating your own via the openSCAD script we mentioned. Then visit the project page on Hackaday.io to get instructions on how you can volunteer to help this community and join their Google Group to continue the conversation. This is a great tactile to learn and a great way to share your talents with the world.

“Often students with visual impairments have difficulty with concepts based on visual/spatial relationships, particularly in math and science. 3D prints offer an unprecedented asset for their teachers, and 3D printers are becoming affordable. But these teachers need help designing models. [Whosawhastis] and I have been volunteer mentors to various groups working on figuring out the best ways to use 3D printing for the visually impaired. Our goal with this project is to document some simple, practical conventions for designing models, and lay the groundwork so that interested parties can create the needed designs. We know that schools have 3D printers and want to teach design thinking to their students. This project creates a minimalist open-source way to link teachers who need design files and (sighted) students who want projects to do. We want students to create the designs for the needed models, learning science, math and other subjects while helping their visually-impaired peers.”

Pasted Image 9 7 16 1 40 PM

3D Printing News – 3D Printed Hair

(video via Futurism)

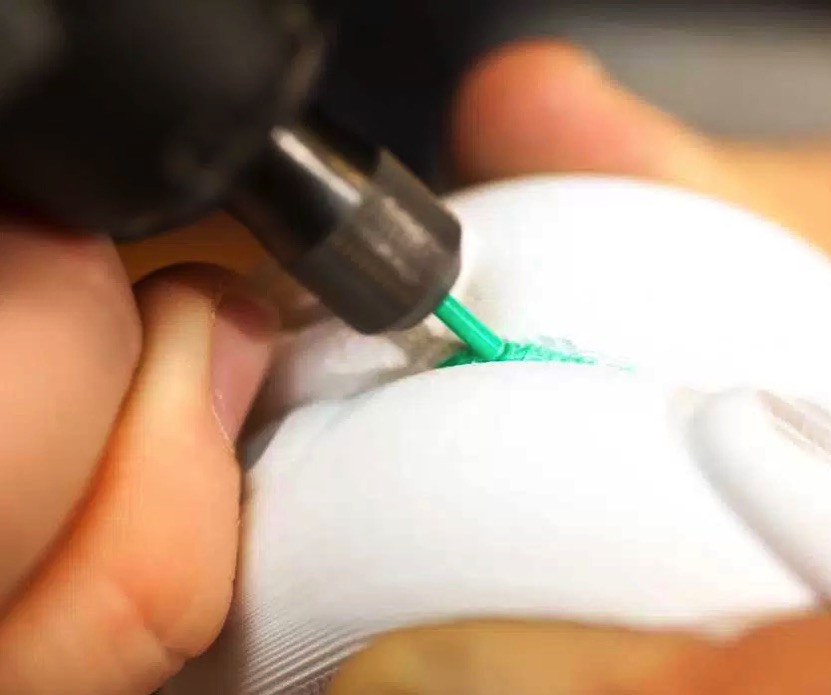
The amazing folks in the Tangible Media Group at MIT Media Lab have shared their research with creating the software to produce small hairs or Cilia from 150 to 50 micrometers to do things such as move, sense, adhere, or be aesthetically pleasing.

Looking into the Nature, hair has numerous functions such as to provide warmth, adhesion, locomotion, sensing, a sense of touch, as well as it’s well known aesthetic qualities. This work presents a computational method of 3D printing hair structures. It allows us to design and generate hair geometry at 50 micrometer resolution and assign various functionalities to the hair. The ability to fabricate customized hair structures enables us to create super fine surface texture; mechanical adhesion property; new passive actuators and touch sensors on a 3D printed artifact. We also present several applications to show how the 3D-printed hair can be used for designing everyday interactive objects.

Read the entire paper here and visit the project page for more fascinating images of this work.

Printing Your Own Hair
If you want to use your FDM printer to try out some hair-powered prints see the below projects.

Droolopp Tutorial
Drooloop flowers are produced by purposefully printing out in the air and taking advantage of sagging filament as an aesthetic feature versus the normal dreaded print failure. Read the tutorial and try out some flowers for your loved one that will never die, create fascinating Jellyfish and in a little different technique create a bottle brush!


3D Printing News – 3D Printed Food

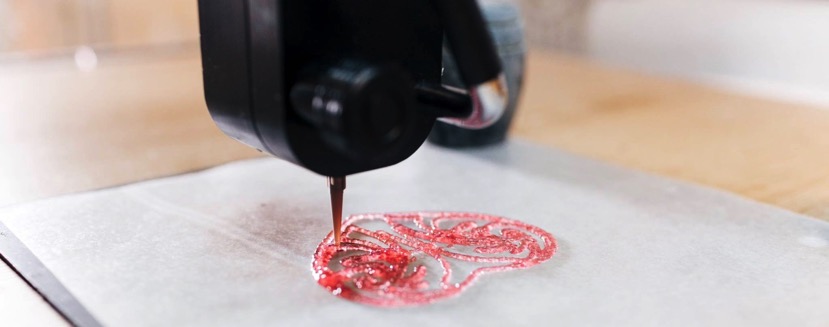
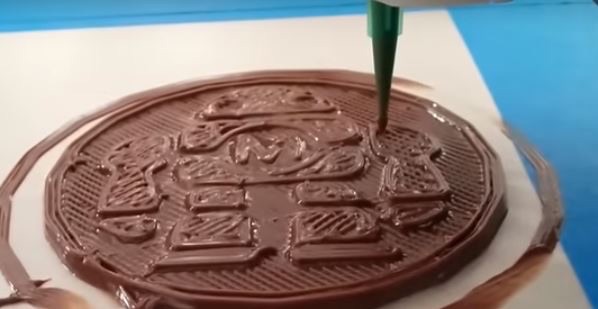
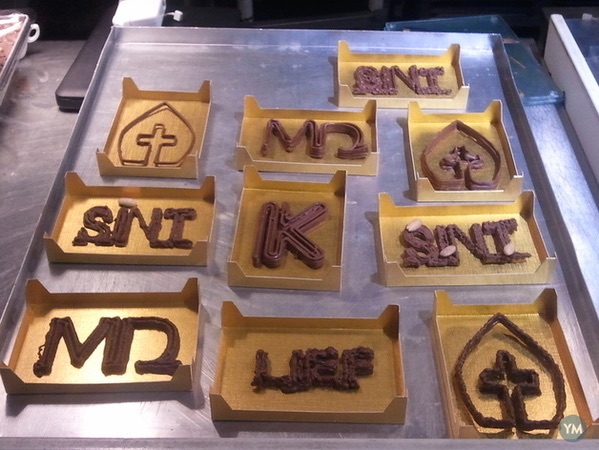
The production of food by machines is a fact of modern food production, from pasta, to Twinkies, to canned foods, raw ingredients are processed in factories all over the world. The only problem is each piece of food is identical, no customization or personalization is possible. Enter 3D Printing. If 3D Printing is considered being in infancy, then printing food is still in the womb. We now have so many tools at our disposal, open-source or not that it’s possible to print in sugar, chocolate, pasta, and more, just by replacing the standard toolhead with one that extrudes softer ingredient materials. Below are just a few of the projects that are growing in the food printing space with large photos to illustrate the yumminess of the prints…and failures! While it can seem like just a fun way to eat sweets on the surface, 3d printing food has ramifications that could help feed the worlds poor, provide elderly with nutrient-rich foods, or provide astronauts in space with a little more variety in a confined space than pouches of powder.

Follow each link below to learn more about buying or making your own 3D Food Printer!


Digital Food | Columbia Engineering
The above video shows what the folks at Columbia University in NYC’s School of Engineering, under the direction of Mechanical Engineering Professor Hod Lipson think about printing food, even going as far as creating a machine that also cooks the food after printing it. Make sure to watch the
behind the scenes video for more!


Pasted Image 8 4 16 12 15 PMCandyFab
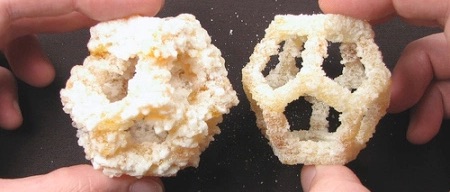
The first 3D printer I ever saw was actually a machine designed to create models from sugar. It used heated air to fuse a sugar bed layer into wondrous geometric shapes. It ultimately was not mass manufactured but at a time when desktop 3d printing machines were coming online in 2009, it was surely a creative influence on many.
Read more about the CandyFab machine!


Pasted Image 8 4 16 9 53 AMPancakeBot
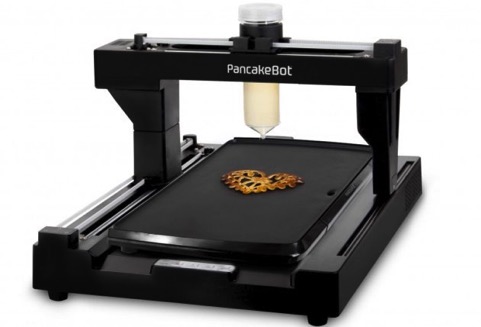
What’s not to love about Pancake bot? What started as a fun family Maker Faire project made out of Legos has turned into a full-fledge product that dispenses pancake batter in shapes that you load into their custom made software.


Pasted Image 8 4 16 12 25 PMPrintrBot
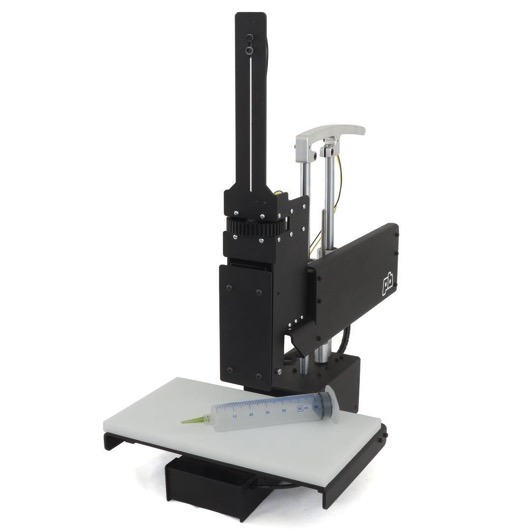
Printrbot, a well-respected 3d printer company, created a commercial paste extrusion system that can be added to their printers. This innovation has also lead to the below product collaborations, the Bocusini, and the Magic Candy Factory.


Pasted Image 8 4 16 10 06 AM

Bocusini
Bocusini calls itself “…the world’s first Plug & Play Food Printing System” and hosts a myriad of recipes an ingredients in this turnkey system that comes with all the hardware and software you need to create your own edible art!


Pasted Image 8 4 16 9 23 AM

Magic Candy Factory

The Magic Candy Factory is indeed a magical place where people can not only buy candy but design and create their own custom piece of candy right in the store.


Discovery Nutella

Discovery Extruder
The
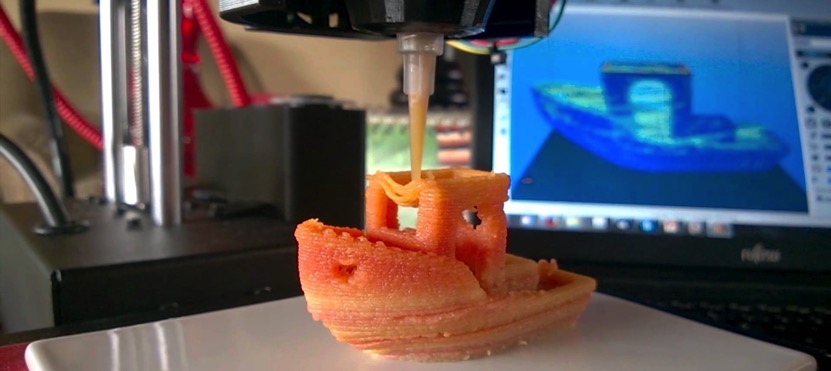
Discovery Extruder is a very refined DIY paste extrusion system that can be retrofitted into any 3d printer, even as a second extruder. While is can indeed extrude exotic materials like silicone, it can also extrude materials like Nutella!


Pasted Image 8 4 16 12 41 PM

Ultimaker Syringe Extruder
This printable open-source design gives you a paste extruder for things like nutella, peanut butter and chocolate. Like all of Joris’ designs it has a unique solution, it uses the filament itself as a cable to pull the stopper down and extrude whatever you load into the syringe.

Tips & Tricks – How to edit an existing STL

Have you ever wanted to add just one more little thing to an existing model? A name, a mash-up of two STL’s? There are plenty of free tools to do it and below are just a few good articles about those tools. First up an video from TinkerCad, then a recent All3DP article that will cover 6 popular modeling programs. Quick links to download them are below. Here is an additional Pinshape article with 10 Steps to STL File Modification: A Beginner’s Guide.

BONUS: learn how to chop up models for printing in sections when you want larger than build volume prints.

Tinkercad
Tinkercad is an easy, browser-based 3D design and modeling tool for all. Tinkercad allows users to imagine anything and then design it in minutes.

FreeCAD
FreeCAD is a parametric 3D modeler made primarily to design real-life objects of any size. Parametric modeling allows you to easily modify your design by going back into your model history and changing its parameters. FreeCAD is open-source and highly customizable, scriptable and extensible.

SketchUp
Hobbyists, kids, and backyard spaceship builders all agree that SketchUp Make is the easiest, most fun, entirely free 3D drawing tool in the world. We think you will, too.

Blender
Blender is the free and open source 3D creation suite. It supports the entirety of the 3D pipeline—modeling, rigging, animation, simulation, rendering, compositing and motion tracking, even video editing and game creation.

MeshMixer
Meshmixer is state-of-the-art software
for working with triangle meshes.

MeshLab

MeshLab is an open source, portable, and extensible system for the processing and editing of unstructured 3D triangular meshes.

(via Tinkercad 3D Design Blog)

BONUS: Learn how to segment larger prints using NetFabb Basic.

NetFabb Basic
netfabb Basic is not just a viewer, it provides mesh edit, repair and analysis
capabilities to everyone already being or aspiring to become part of this fantastic,
growing, creative, high-tech industry called Additive Manufacturing,
Rapid Prototyping or 3D Printing.

3D Printing News – Finishing and Post-Processing Your 3D Printed Objects

Friction welding

“Friction-weld, rivet, sand, paint — arm yourself with simple tools and techniques to take your 3D prints to the next level.”

Continuing with our recent posts about post-processing we refer back to this 2013 article from MAKE Magazine Volume 34, our own Matt Griffin shares some of the tools, materials, and techniques that will take the first step of outputting a raw 3d print to a fully realized finished model. Add friction-welding and printed rivets and hinges to your toolbox and be ready for your next project.

Read the full article here

Updates and improvements to YouMagine

Today we migrated to new servers in order to improve our response time for you.

videoyoumaginescreenshot


You can now also add videos to your designs to show how your uploaded project works and what it does. We hope that this will especially help those who are making more complex items. We also hope that people will upload build videos to show how things are to be assembled if they require assembly.

We changed the design of our Terms of Service to make them more readable.

Our Notice and Takedown procedure has also become prettier and more readable.

We updated a number of security procedures and security updates to make the site safer to use.

We updated to a new version of Rails.

There was a bug whereby the thumbnails were not displayed next to the search results, this was fixed. We improved the search to show more recent designs.

If a community member ends up on the 404 page then we now display a search window so they can directly search for what they are looking for.

People can now make longer abstracts of their designs and edit them.

We’re working hard to improve the site further, email joris at youmagine.com should you have any feedback, ideas or improvements.


Aidan Leitch’s Silicone 3D printing process

Aidan's Syringe Extruder Top View

Aidan’s Syringe Extruder Top View

A few months ago we held a Contest whereby we challenged our community to develop a new 3D printing technology using an Ultimaker Original. 13 year old Aidan Leitch was one of the winners and attempted to make a Silicone 3D printing process.

You can download the files here on YouMagine.

Aidan made a Syringe extruder that uses a peristaltic pump to extrude a two part silicone into a basin to cure. The resulting shapes he’s been able to create are closer to blob than Michelangelo but this is a very promising idea. There are many two component materials such as polyurethane & epoxy adhesives. If we could make it possible to print materials such as these reliably it would be a big step forward.
I asked Aidan about his project and he said that,
“One of the biggest issues was making a good syringe extruder. There were some designs already out there but none that truly fit what I was doing. The part that took me longest was making changes in Cura. “
What more work will you do to improve the project?
“To improve, I’d need to make a better syringe extruder (possibly a direct one, as opposed to using the filament to push the syringe) and also a better system for delivering the other part of the silicone mix. The peristaltic pump I used was really slow.
The basin fixed to the build plate

The basin fixed to the build plate

What results do you have right now?
As of right now, I have successfully had the printer add one part of the silicone into the basin of the other part and have them cure. To make it work better, I’d to make the previously mentioned changes (better syringe extruder and better delivery system) along with further tuning of the software. Many of the parts for the paste extruder are fully 3D printable and attach directly to the printhead. Besides this, there are the electronics/pump, the basin, and some changes in the software.
What did you learn?
I’ve learned quite a bit from this project! Here’s some examples:
-How to read and write basic Gcode
-How to accommodate in software for physical issues (like friction in the syringe)
-Uncured silicone is messy stuff
Because it is all deliciously open source you can download and build on Aidan’s project here.

Scrufie the adorable obstacle avoidance robot on YouMagine

Scrufie the adorable Arduino powered ultrasonic sensor obstacle avoidance robot

Scrufie the adorable Arduino powered ultrasonic sensor obstacle avoidance robot

In honor of our ELF VR Drone contest where you can win your own drone, I checked out some of the awesome robots on YouMagine. Rtheiss’ S.C.R.U.-F.E. is a “Simple C++ Robot with Ultrasonic-sensor” is a maze avoidance robot got printed when his, “two year old daughter fell in love with an old ultrasonic robot that I built in elementary school twenty five years ago.  It’s missing parts and no longer works, but she has treated it with love since she was one year old.” “For her third birthday, I set out to make a sub $50 Robot with easily replaceable parts.”

Scrufie the adorable Arduino powered ultrasonic sensor obstacle avoidance robot, side view

Scrufie the adorable Arduino powered ultrasonic sensor obstacle avoidance robot, side view

“My daughter adores this Robot.  She named him Scrufie”  Rtheiss is a teacher and hopes that this great Arduino powered bot will help his school learn “C++ coding/programming and Robotics.” “The print time is about an hour for all five parts, requires 7 soldered connections (beginner level) and takes about 2 hours for a beginner to assemble.”

Scrufie looks sad sometimes

Scrufie looks sad sometimes

A lovely story and a great inexpensive bot for education! You can download the parts and look at the Bill of Materials here for this $50 bot.


Interview with Ryan Adams of the MaplePrintMini 3D printer

We love it when our community shares 3D printer upgrades, improvements or entire 3D printers on YouMagine. Ryan Adams did just that, he made his MaplePrintMini 3D printer and shared it with the world. We were curious about his machine and asked him how he made it. We were especially intrigued since apart from the electronics, screws and motors the MaplePrintMini is entirely 3D printed.

Ryan Adams leaning forward next to his MaplePrintMini 3D printer

Ryan Adams and his MaplePrintMini 3D printer

Why did you make this printer?

My original reasoning for this printer was to prove that I could design and build a printer myself. All of the printers I had owned up to that point (A Printrbot and MakerFarm Prusa i3) were built from kits, and I wanted to prove that I could design and produce a similar printer to theirs. I was also captivated by the idea of the RepRap project, and wanted to see how far I could take the project’s philosophy in designing this printer, with the end result being one which is, excluding mechanical components, almost entirely 3D printed.

How did you do it?

When I set out to design this printer, I had two main goals, the first that I be able to print as much of the printer as possible, and the second be that the overall foot print of the printer be less than that of a legal-sized sheet of paper. Strange, I know, but I wanted to keep the printer’s foot print small and portable. The design process was fairly straight forward, I set up my size boundaries, and designed the printer within those boundaries. I used AutoCAD for most of this process, and relied heavily on my own calipers, and rulers to measure mechanical components that I’d then model in CAD, and build the printer around. It had been several years since I last designed or modeled anything with this sort of scale, so it was very much a learning process for me, trying to remember how to model and design parts correctly. The preliminary design took place over the winter holidays, and took about 30 hours from conception to printable designs.

Did you design the whole thing in one go and then build it? Or was it more an iterative process of improving parts?

Throughout the initial design process, there was multiple times that I would spot an issue, or think of a better way of designing a part. The extruder carrier, and X-axis have probably gone through 4 or 5 revisions before I even thought about printing. The revisions were far more minor once parts were printed though. I tried my best to catch as many errors and flaws as I could while still in the design stage, so that I could minimize my printed waste and build the printer quicker. With the exception of 4 or 5 parts, every piece was printed the way it was designed initially. I was honestly surprised that when the build process begun, that parts fit as well as they did, and that most everything just seemed to work correctly. As the build progressed, I revised a few parts to aid in the assembly process, or in the case of the extruder, to add additional cooling, but for the most part, it was a straight forward build with very few issues.

What’s so special about it?

I think what sets the printer apart is its printable design. No component on this printer is larger than 195mm x 195mm, which allows anyone with a average sized 3D printer to print all the parts for this project on their own. I also feel it embodies the RepRap philosophy better than some other machines with which to the extent of how much of the design is printable. I admire printers such as the Prusa i3, MendelMax and others, but seeing their wooden and metal rod construction takes away from the concepts of a true RepRap, so I feel this printer is proof that it is possible to build a strong, accurate printer using almost entirely 3D printed parts.

What would I need besides the design files on YouMagine to build one?

Aside from the design files on YouMagine, you will need a 3D printer or someone with a 3D printer to print the parts. Expect the parts to take 60 or so hours to print, it’s a long job, but worth it when it’s done. Once you have printed all the required parts, you will need the ‘standard’ mechanical components which consists of the usual NEMA 17 steppers (in this case, 36 oz smaller units are used), 8mm linear rod and LM8SUU linear bearings. You will also need about a meters worth of GT2 belt, and 16 or 20 tooth pulleys, 4mm threaded rod and couplings for the Z axis as well and you will also need 3 micro switches for the end stops. Extruder wise, I used a Printrbot Aluminum extruder, and a Ubis hot end, though you could mount your own direct drive extruder and hot end of your choice. Electronics wise, your choice of controller, RAMPS or a printrboard should fit in the enclosure. Lastly, you will need screws, a lot of them. There are about 150 M3x10 socket cap screws used, and about 30 M5x20 socket cap screws as well.

A purple 3D printed shark form Shark test piece made on a MaplePrint Mini.

Shark test piece made on a MaplePrint Mini.

What kind of print results do you have?

Print results have been fairly decent given the relative state of calibration that it has received. I was very pleased that upon printing my first calibration cube, that the dimensions were accurate in both the X and Y axis, and that the details and layer heights seemed well defined. Subsequent prints such as Mr. Jaws have pretty well defined detail in the teeth and corners, and came out better than I was expecting. I’m still tuning the printer, and calibrating the e-steps and extrusion, so there are still improvements to be made, but overall, the printer prints better than some of my first prints on other machines.

What software did you use to design it?

All of the design was done in AutoCAD 2015. I prefer the work flow and familiarity of AutoCAD over that of Inventor or Solidworks. All of the mechanical components were modeled in AutoCAD as well. Before printing, I ‘plated’ the entire model, that is, disassembling my design into ‘plates’ of correctly orientated parts that could be exported to STL’s and printed. This saved a lot of time later on and removed the need to have to manipulate or optimize the part in my slicer.

What firmware does it run?

The printer uses a stock RAMPS 1.4 controller running ErikZalm’s MarlinFirmware. I selected Marlin over others for its configurability and simply configuration. Total time from downloading, modifying, flashing, to printing, was about half an hour.

What was the most difficult part of making the printer?

Probably the most challenging part of the entire process was printing the frame. Each frame panel required 5 hours of print time, which given my daily schedule made it difficult to fit these prints in. It meant that these pieces were printed on weekends and days off, which in turn delayed the entire process. Aside from that though, the process was fairly straight forward, if I had any other complaints about the process, it would be the almost-insane amount of screws required in the build. I wanted to ensure the printer was structurally sound and rigid, so I designed it with many mounting points, but it was only when I started building the printer did I realize juts how many I had used!

MaplePrint Mini 3D printer printing.

MaplePrint Mini 3D printer printing.

Where do you hope to go from here?

Well I’m on to bigger and better things already! Shortly after finishing this printer, I embarked on the design of its successor. While I’m pleased with how this printer came out, I recognize that there is still a lot of room for improvement and optimization. Now that we know it’s possible to build a printer from almost entirely printed parts, I’m again using this approach for version two. I’m finalizing the design now, and hope to be printing parts for it in the next week. I will again be publishing my progress and design, and releasing the designs for the printer on YouMagine shortly, but I can promise that it will have a much larger build volume, and equally small foot print, improved rigidity, and far fewer parts to print and assemble. Aside from that, I hope I can continue to design and release printers, components and upgrades that further the RepRap project, excite current 3D printer users, and introduce new users and designers to the amazing industry of 3D printing!